
Arm Remote
Wearable Technology
CAD: Solidwoks
Design
Design
CAD: Solidwoks
Assembly and Soldering
Electrical
Electrical
Assembly and Soldering
Computer and Hardware
Software
SoftWare
Computer and Hardware
Python
Coding
Coding
Python
Design
SoftWare
Electrical
Coding

The Interface
Designing around Electrical
I began this project by first imagining what buttons were necessary to control my other project, Podex. A sequence of buttons, a joystick and lights would be needed for me to effectively use this remote. I didn't design the interface cover until after the interface electrical board was created and soldered. The design became very challenging, I had to fit all the small electrical components and the amount of wires it needed became a lot to design around. The finished product is shown in the CAD visualization.


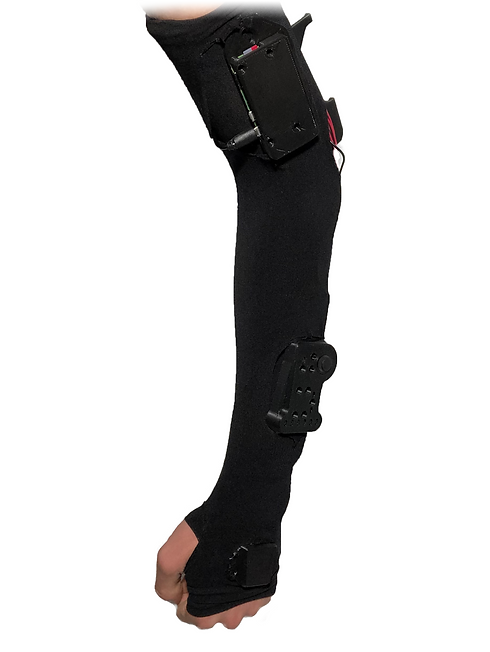
The Arm
Components
To make this arm work I need 4 things: power, a computer, the interface and a gyro. The battery pack is not pictured, but I held a 7.4 Lipo battery that could be easily removed and powered on. The computer sat on my arm next to the battery connected with power and electrical connections. The interface sat on my forearm just as you would see in a sci-fi movie. The gyro sits on my hand, making it easy to use. All of these components were sewed onto an arm sleeve. Another arm sleeve was cut to cover the wires. Currently, I have not finished sewing the second arm sleeve to cover the gaping holes it leaves.
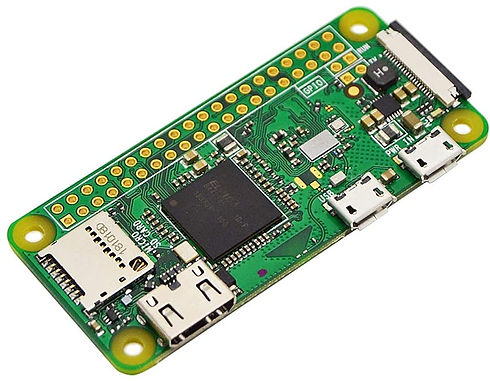
Motherboard
Raspberry Pi Mini
My love for Raspberry Pi’s didn’t end with this project. For this one I used a Raspberry Pi mini for its small board. This little guy had all the processing power I needed to get this project on its way. It still had a 40 GPIO pin layout which was necessary for the project.
Gyro
Hand Motion Input
This is perhaps the most interesting part of the whole remote. On the top of my hand sat a gyro. With a push of a button from the input control, the gyro would measure the angles I would make by tilting my hand. Using these inputs I desired to control Podex (another project of mine) by making it follow my hand. For instance if I rolled my hand, the robot would roll its entire structure. This was part of the Gen 5 code I talk about on the Podex page. Unfortunately other things compromised the project, however the gyro worked perfectly, capturing the angels my hand made.

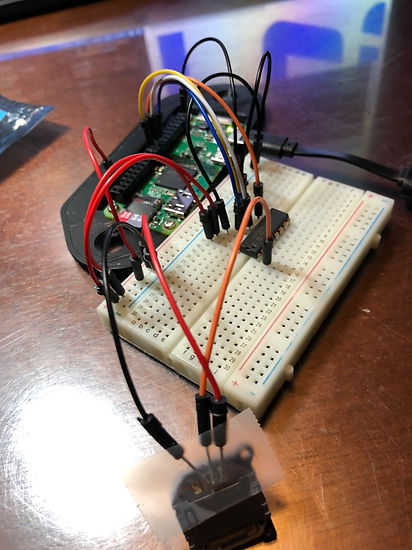
Analog Input
Joystick and Gyro
A lot of electrical work went into this project, Unfortunately I do not have pictures of all the work I did. The pictures shown illustrate the testing I did on the I2C board and gyro I was using. The Raspberry Pi does not have analog inputs. To get around this I used the I2C board to convert analog inputs into digital signals. This was the first time I used the circuit, so I learned as I went and I got it to work. The electrical became a rats nest. I used every single GPIO output pin on the board. The only remaining pins were the ground pins.


Lights and Buttons
GPIO ports and boards
The code wasn’t just as simple as sending a pushed button to a true statement for the robot to react to. A button on the interface of the remote could have multiple functions. There were seperate menus built in. Pushing the “menu” button would alter the interface from a walking mode, to a manual control mode, where each leg could be controlled. Different buttons could also be pressed and held to preform other functions. Lights on the interface would turn on and off to indicate what menus you were in.

Sockets
Remote Connection
To make this project work I had to learn the Socket library. This is by far one of my favorites. This library allows python scripts to communicate across a network. This allowed my arm remote to send signals out to my other projects.